View/Edit Fixed Asset
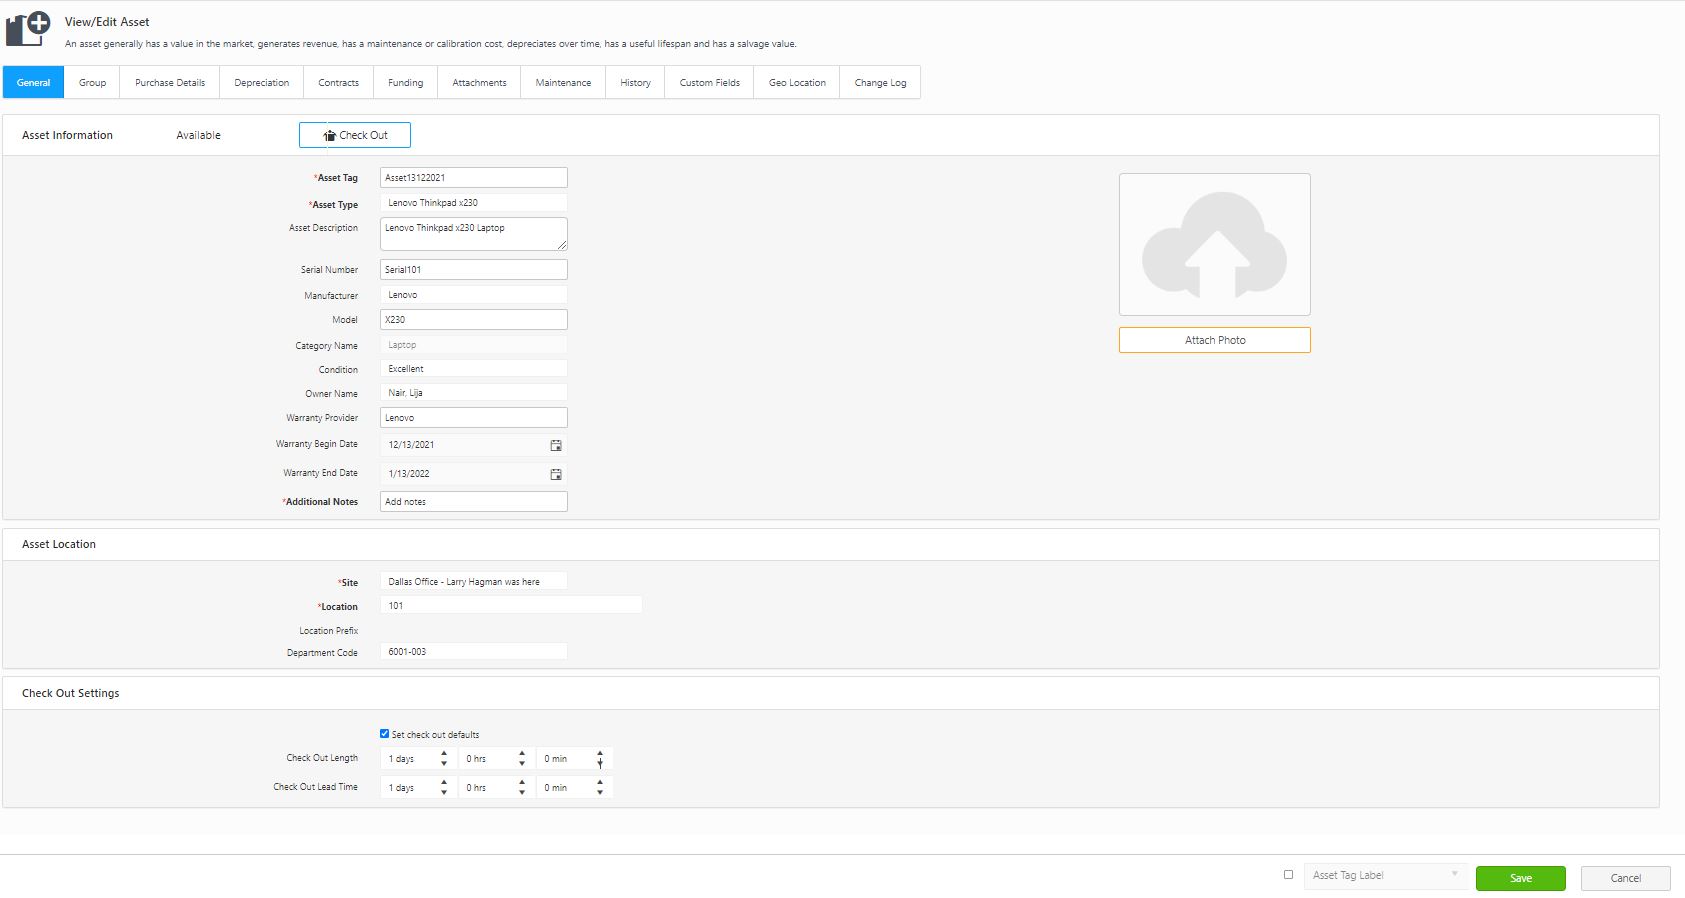
The View/Edit Fixed Asset screen lets you update fixed asset details. You can update general details, purchase details and add attachments, if any. This screen is identical to the Add Fixed Asset screen, except all the previously entered information will appear. There are a few additional tabs - Contract, Funding, Maintenance, and History.
- Click on the Assets -> View Assets.
- The View Assets screen will appear. Select/Search for the Fixed asset and click the Asset Tag link or the Edit button.

- The screen will navigate to the Fixed Asset - View/Edit Asset screen.

- The View/Edit Asset screen has the following tabs:

Note on Custom Fields: Users can edit the read-only custom fields if their role has Edit Read Only Fields permission. The “Edit Read Only fields” permission is given to a role by the App administrator or the user who has administrator rights. Refer to the topic Edit Read Only Fields for more details.
- General Tab - Update the Asset Information, Location, and Check Out Settings. Refer to the Add Fixed Asset topic for more details.
- Check Out Option - The Asset information will let you know the assets' availability. If it is available, it will display "Available" along with a Check Out button. The button, on clicking, will navigate to the Checkout screen. Refer to Checkout for more details.

- Check In Option - If the asset is already checked out, then the Asset Information will display the "Checked Out To" along with the Check In button. The "Checked Out To" will display the name of the person to whom the asset is checked out. The button, on clicking, will navigate to the Check In screen. Refer Check In for more details.

- Group Tab - Update the Group related information. If the asset is not a Group, then you can set the asset as a Group and add/ remove assets. Also, you can check the "Transact As Whole" and "Audit As Whole" options. Refer Group.

- Purchase Details Tab - Update the Vendor Number, Purchase Order, Purchase Date, and Purchase Cost.

- Depreciation Tab - Update the depreciation details.

- Contracts Tab - Update the contract details.

- Add Contract - Select a contract from the drop down and click on the Add button.

- Update Contract - If the asset is already associated with a contract, the contract details will appear. To edit the contract, click on the Contract Number, and the screen will navigate to the View/Edit Contract page. Select the checkbox to remove the already associated contract and click on the Remove button.

- Funding Tab - Update the funding details.

- Add Funding - Select fund from the drop down and click on the Add button.

- Update Funding - The funding details will appear if the asset is already associated with a fund. To edit the funding, click on the Funding Name, and the screen will navigate to the View/Edit Funding page. Select the checkbox and click on the Remove button to remove the already associated funding.

- Attachments Tab - Attach the relevant documents. It will also list the picture uploaded in the General tab. Refer to Attachments.

- Maintenance Tab - Update the asset maintenance details. Click on the Task Name link to access the Maintenance screen, where you can edit the Quick maintenance and Scheduled Maintenance details related to the asset.

- History Tab - Displays all the transactions related to the selected asset.

- Custom Field Tab - Update all the custom fields, if any.

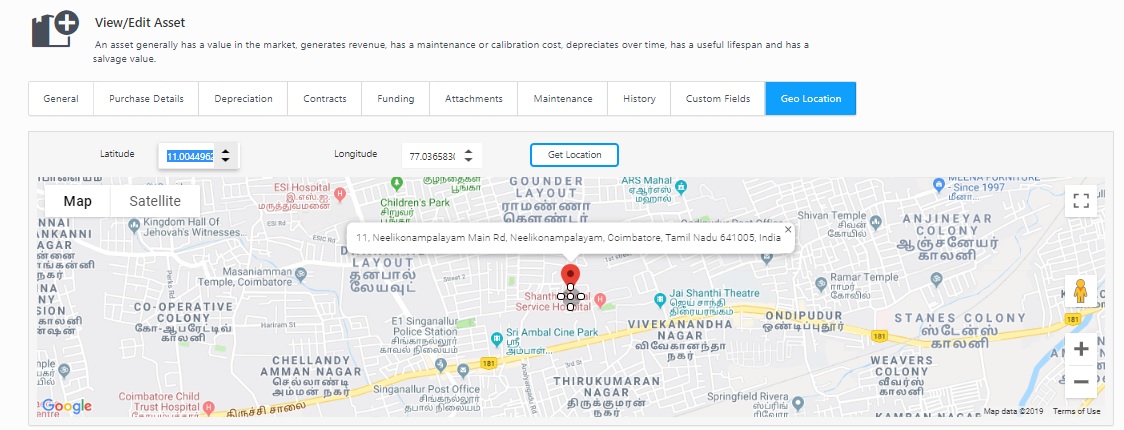
- Geo Location Tab - Shows the location of the fixed asset. It will display the Latitude and Longitude values. Click on the View Location button in the General tab (The View Location button will appear under the Attach Photo button in the View/Edit Fixed Asset screen) or the Geo Location tab to view the location of the asset in Google Maps. Click on the Get location button to update the location details of the asset.
Note: When using Geo location services from Desktop or Laptop computers or any other device that does not have built-in GPS hardware or a clear fix on satellites in the Sky, Google Maps will attempt to find an approximate address based on your Network and/or other attributes. This is just an approximation. For better results, use an iOS or Android Mobile Device with GPS outdoors, preferably on a sunny day or clear night. (Rain may also affect accuracy somewhat.)

Or
The Google Map will appear if the Google API Key is validated in the Google Maps API Key screen.

- Change Log Tab - Change Log feature helps to track all assets (both fixed and multi-quantity) edit changes. It will capture the data in the application (both web and mobile) that has been created, updated, or deleted by the user. It will display what the changes are, who made the change, and when it was made.

Once you update all the fields, click on the Save button. The screen will navigate to the View Assets screen.


