New Asset Type
This topic discusses Asset Types for Fixed Assets. For instructions on creating Multi-Quantity Assets, please refer to the topic New Multi-Quantity Asset.
The New Asset Type page allows you to enter a new Asset Type in the database. Creating asset types is the first step in adding fixed assets. You must first create your Asset Types, and then each fixed asset you add to the system must be assigned to a specific asset type. You can think of asset types as a classification for assets. For instance, you may have an asset type of IBM Laptop X6000 that defines the manufacturer, size specs, etc., of this particular type of computer. Then specific computers of the same type are assigned as assets to the IBM Laptop X6000 asset type. Asset types are created in the database using the New Asset Type screen, or you can import this information. You can then assign assets to a specific asset type on the Add Asset page.
The Asset Type contains information such as Description, Check Out settings, Depreciation Class, Category, Manufacturer, and Model Number.
The following topics are discussed in this section:
New Asset Type Screen
New Asset Type Screen
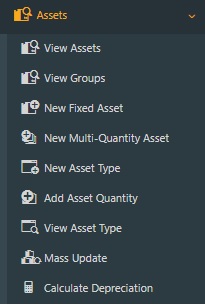
Click on Assets > New Asset Type.
The New Asset Type screen will appear.
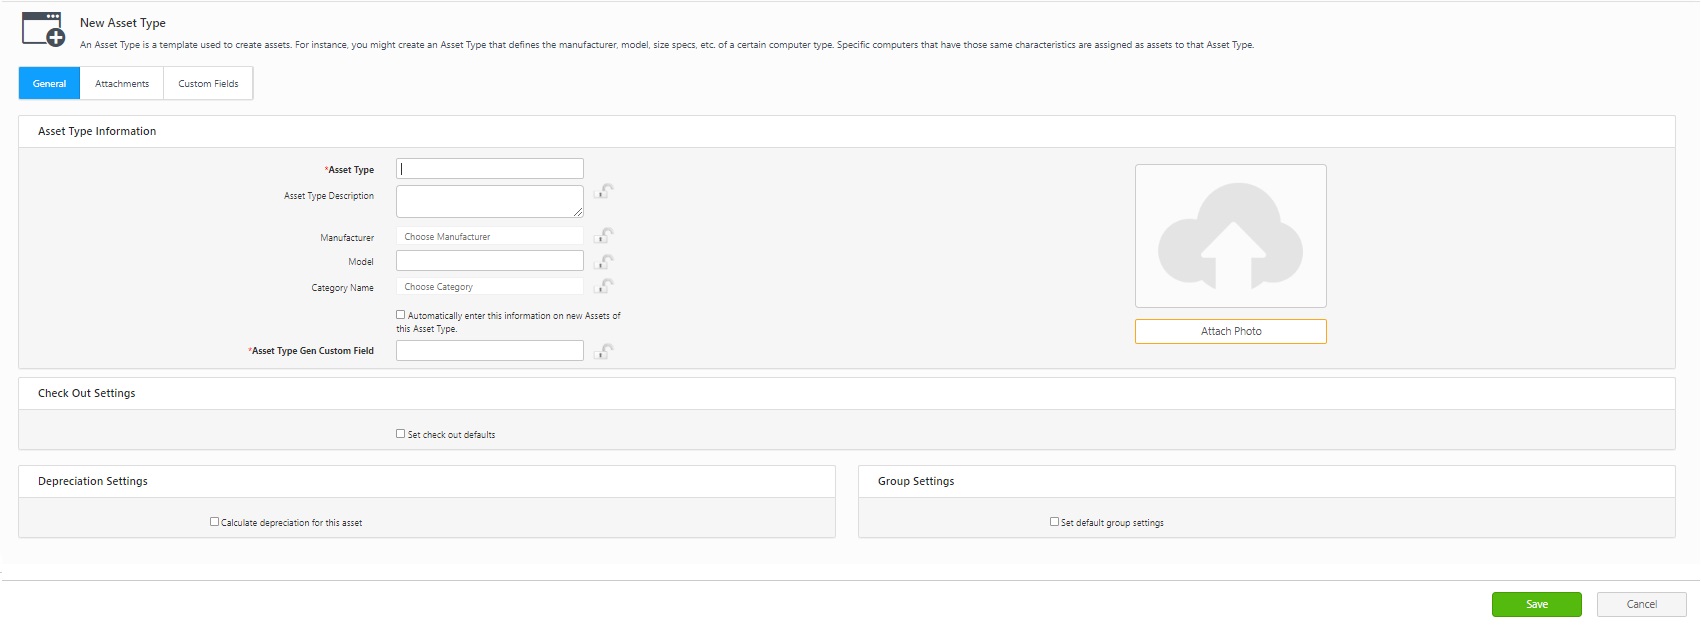
Note that certain fields on this screen have the option to be "locked." When a field is in the locked state, it will preserve the data you've input for future transactions. This feature comes in handy when you're either adding multiple assets to a specific location or checking out several assets to a single customer. To lock a specific field, simply click on the lock icon. If you want to lock all fields with this icon at once, you can use the Lock All button for quick action. Conversely, if you wish to unlock all the fields to allow for new information, you can select Unlock All.
For guidance, click here for information on how to lock fields.
General Tab
- Asset Type Information Section - Complete the following fields in this section:
- Asset Type: (Required) To create a new Asset Type, you must enter a unique alphanumeric name in the Asset Type field. This name must be unique across all sites and locations. Asset Type is the only required field on this page. All other fields are optional; however, completing as much information as possible to describe the asset type is useful.
- Description: Enter the description. It can be any text used to describe the Asset Type.
- Manufacturer: Choose the manufacturer.
- Model: Enter or select the model.
- Category Name - Choose the category.
- Automatically enter this information....checkbox: Select this checkbox when you want these three fields (Description, Manufacturer, and Model) to auto-fill when you create new assets assigned to this asset type.
- Attach Photo - Attach a photo (optional). To add a photo:
- Select the Attach Photo button. The Attach Files screen will appear.
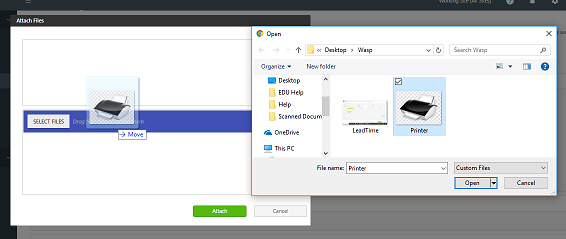
- Click on the Select Files button. Browse the folder, select the image, and click on the Open button Or drag the image from a folder and drop it into the Attach Files window. Ensure that the Select Files area is highlighted before dropping, as shown below.
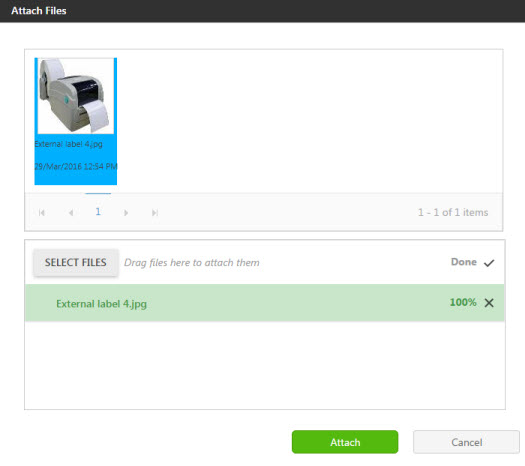
- The Image you attached will appear in the window. Click on the Attach button. The photo will appear in the photo section. Click on the Change Photo to access the Attach Files screen and select a different image.
- Check Out Settings Section - This section allows you to set up check out defaults such as length and due date. All the fields in this section are optional. Select the Set Check Out Defaults checkbox to display the options.
- Check Out Length - This field specifies the default duration, in days, that assets assigned to this asset type can be checked out to a customer or employee. Leave this field at zero to indicate no due date.
- Check Out Lead Time - This field specifies the lead time needed before an asset can be checked out after it is checked in. This allows time for repairs and maintenance. Leave this field at zero to indicate no lead time.
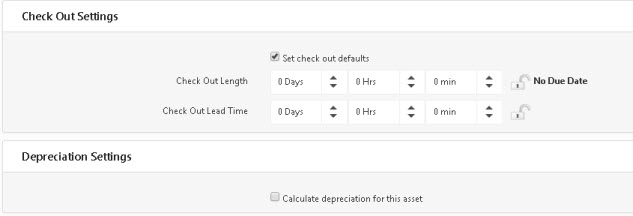
- Depreciation Settings Section - Depreciation Settings are used to calculate depreciation for all assets assigned to this asset type. To Choose Depreciation Settings:
- Click on the Calculate Depreciation for this asset checkbox. Additional fields will appear.

- Select a Depreciation Class Name from the drop down menu.
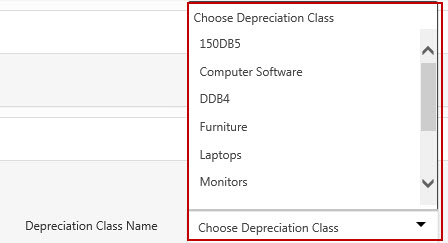
Note: Depreciation Classes are set on the New Depreciation Class screen.
- Group Settings Section - This section allows you to set the group settings of an asset.Click on the "Set default group settings" checkbox. The following checkboxes will appear - Is Group, Transact as Whole, and Audit as Whole.
- Click on the Is Group checkbox. It will set the asset as a group.
- Transact As Whole - This checkbox is enabled when "Is Group" is checked. When you click on the "Transact as Whole" checkbox, it means that when you perform a transaction on any child's assets, the whole group will be transacted, and you will see the parent group in the transaction grid. This checkbox/option is not mandatory.
- Audit As Whole - This checkbox is enabled when "Is Group" is checked. When you click on the "Audit as Whole" checkbox, it means that when you perform an audit on any child assets, the whole group will be audited, and you will see the parent group in the transaction grid. This checkbox/option is not mandatory.

Attachments Tab
Click on the Attachments tab to add an attachment (an image or a document) to this asset.
Note that the picture attached in the General tab will also appear here.

To add an attachment:
- Click on the Attach Files button.
- Click on the Select Files button. Browse the folder, select the file, and click on the Open button. Or drag the file from a folder and drop it into the Attach Files window. Make sure the Select Files area is highlighted before dropping.
- The file you attached will appear in the window. Click on the Attach button.
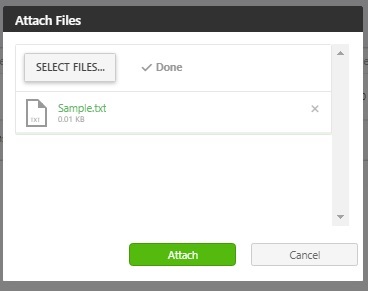
- The file will appear in the attachment tab.
- The file name can be edited by clicking the Edit button. After editing, click on the Update button. The file can be deleted by clicking on the trash can button.
- Offline Mobile Attachment - Click on the checkbox if you want the attached files to get downloaded automatically in the mobile application. Refer to Downloading Attachments.

Custom Fields Tab
If the custom field is configured for the asset type, then the custom field tab will appear. Enter the required details and save.


