Configure SAML IdP using ADFS/Azure
Using SAML-based SSO, Single sign-on (SSO) lets users sign in to all their enterprise cloud applications using their Azure and/or Active Directory domain account credentials. You can use both Identity Provider (IdP) initiated SSO, and Service Provider (SP) initiated SSO.
Note: If you configure your SAML server to return the group claim, make sure the user is included in a group named exactly like the Wasp Users Role.
Single Sign On
Prerequisites
Configure SAML IdP using ADFS/Azure
Settings Import and Validation
Configure SAML IdP using ADFS/Azure
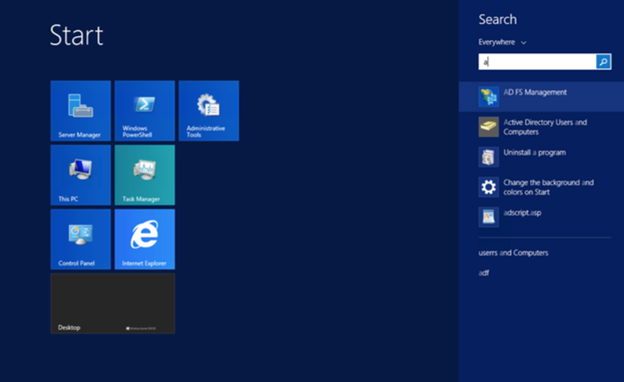
- On your ADFS Server, Open up AD FS Management.
Note: The email returned by ADFS must match the email of the person configuring ADFS during validation. The email returned by ADFS must match the email of every user during registration and login as well. The email is used to find the Wasp user account during ADFS login. If the Active Directory email for a user changes, then that user's email in Wasp must also be changed to match or the user will need to accept a new invitation and registration.
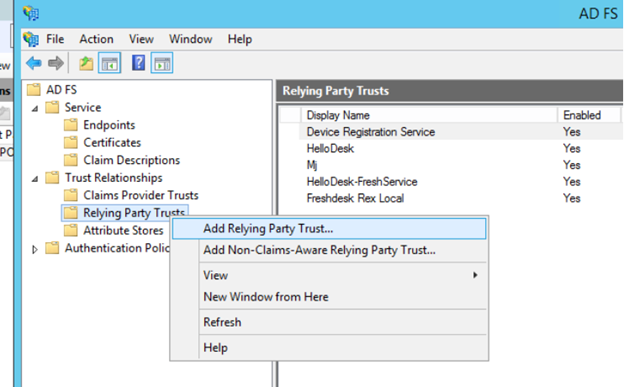
- Right-click on Relying Party Trusts and select Add Relying Party Trust. This will launch the Add Relying Party Trust Wizard.
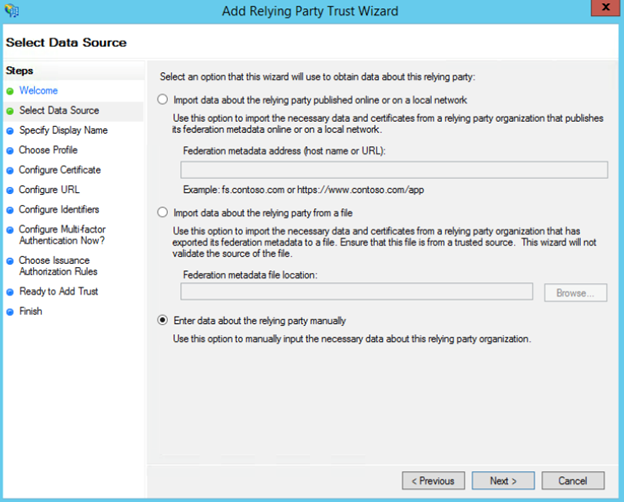
- Select Data Source - Choose "Enter data about the relying party manually".
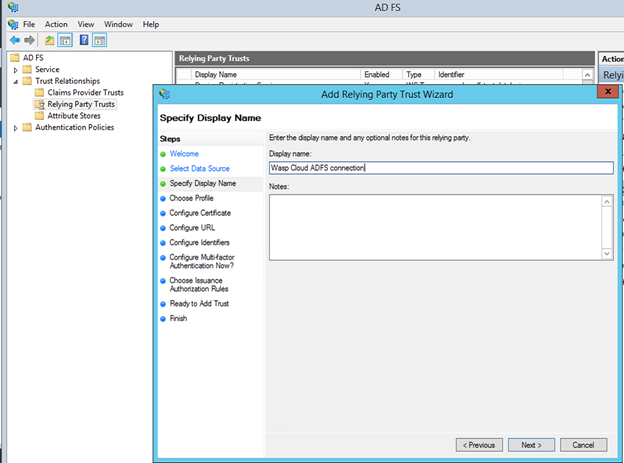
- Enter a display name. Click Next.
- Choose AD FS profile with SAML 2.0. Click Next.
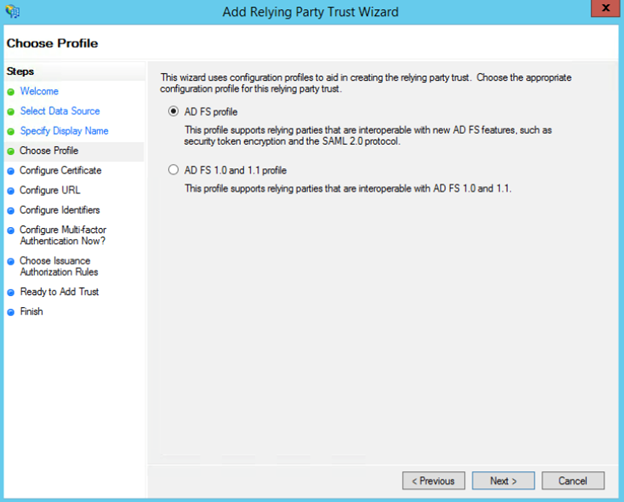
Click Next on the Configure Certificate screen without choosing any certificates.
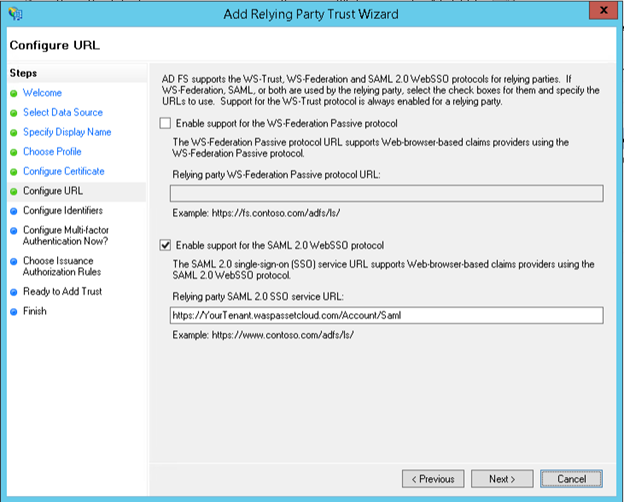
- Select "Enable support" for the SAML 2.0 SSO Web SSO protocol.
- Enter the login URL. This is your tenant URL with the suffix / /Account/Saml. Remember the value you copied from the Wasp Settings screen back when you checked the prerequisites, paste that here.
For verification, the SSO Service URL would be : https://yourtenant.waspassetcloud.com/Account/SAML
Important!: Please make that you always use an HTTPS URL. ADFS is also picky about upper and lowercase URLs. In this case, we strongly recommend just copying and pasting the URL.
- Add a Relying party trust identifier. Example - yourtenant.waspassetcloud.com
This is your tenant URL without the suffix /Account/Saml. Here, we also recommend copying and pasting the values. Copy the Entity Id field from Settings and paste it. It would be https://yourtenant.waspassetcloud.com
Click Add.
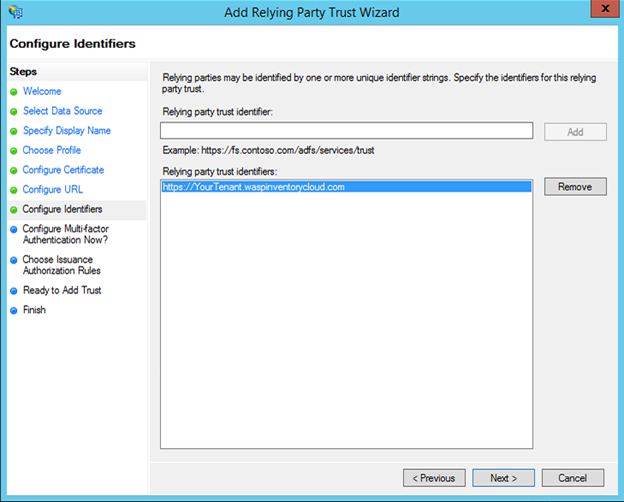
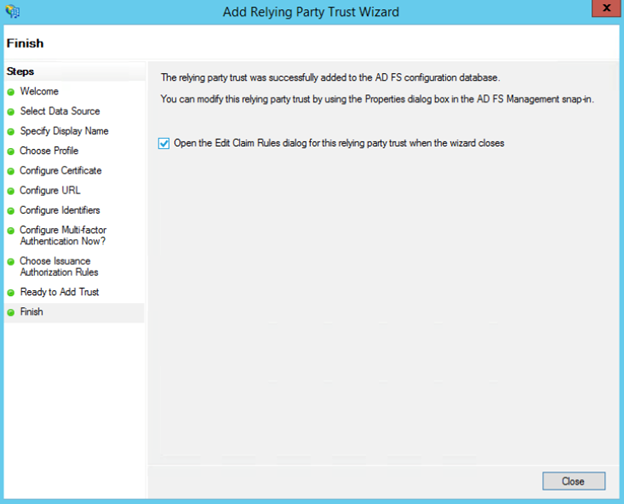
- Click Next until you reach the Finish screen.
- Choose "Open the Edit Claim Rules dialog" before clicking finish to edit the further configuration. This will launch the Edit Claim Rules window.
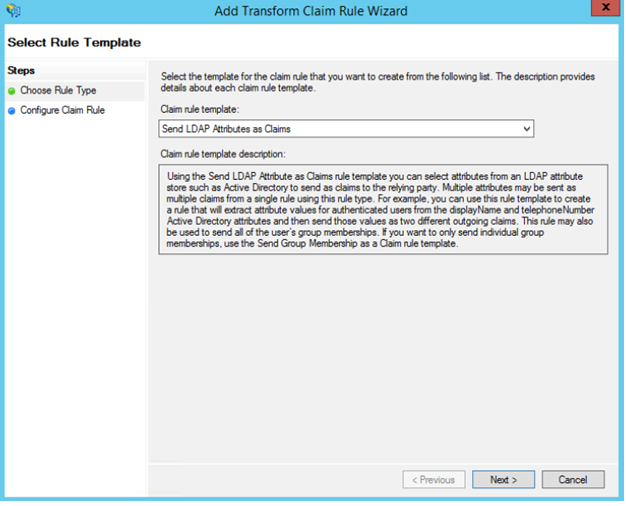
- Click on Add Rule and Choose Claim Rule as Send LDAP Attributes as Claims.
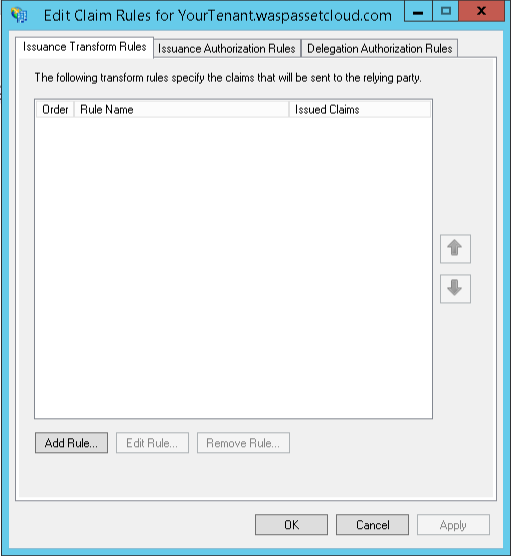
- Wasp requires two or three attributes from SAML - Username, email, and for added security, Group. You can pass these parameters from LDAP rules. For more information on the attributes that are accepted, refer to the solution.
- You can add the Outgoing claim Type as shown in the image here.
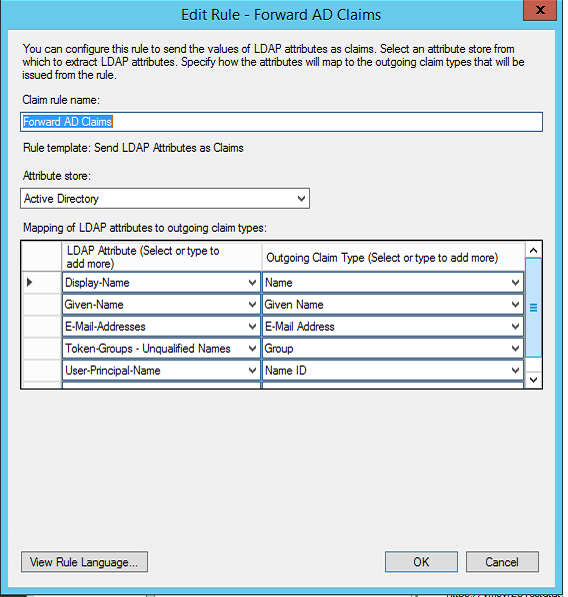
- Click OK.
- On the AD FS Management window, right-click on the Relying Party for Wasp and choose properties. Under the Advanced tab, choose SHA-256 as the Secure hash Algorithm.
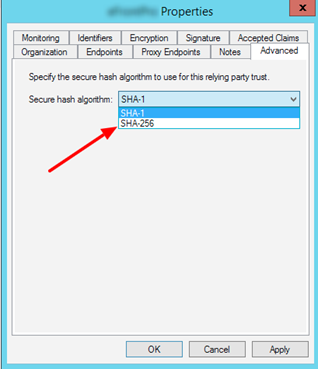
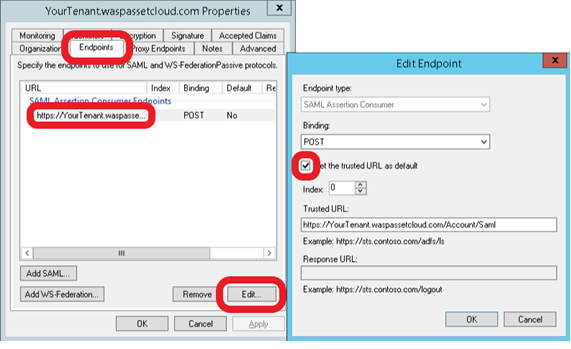
- While still in the properties window. Under the Endpoints tab, choose the endpoint yourtenant.waspassetcloud.com. Click on the Edit button. Check the "Set the trusted URL as default" option on the Edit Endpoint window.
- Download the Metadata.
- AD FS Management Window, choose Services -> Endpoints so you can find the Metadata URL for your AD FS server.
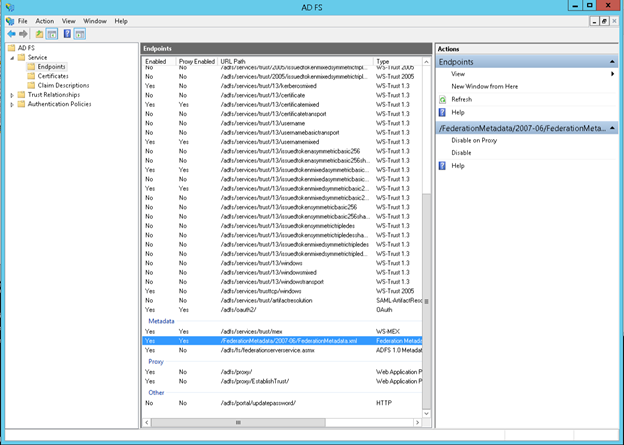
- To get the full Metadata URL for your ADFS instance combine the metadata path shown above with the URL Host of your ADFS instance. It should look something like this:
https://adfs.YourBusiness.com//FederationMetadata/2007-06/FederationMetadata.xml
We highly recommend browsing to that URL to download the XML Metadata configuration file. We will need to use that later to fill in settings in Wasp.
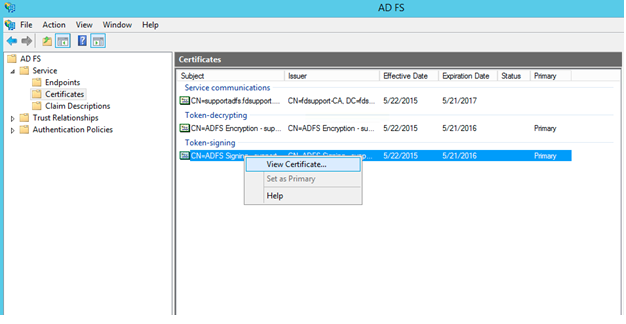
Alternatively, On the AD FS Management Window, choose Services -> Certificates and double click on Token Signing Certificate, which will give you an option "copy to file". By doing this, you will be able to export the X509 certificate from the raw file.
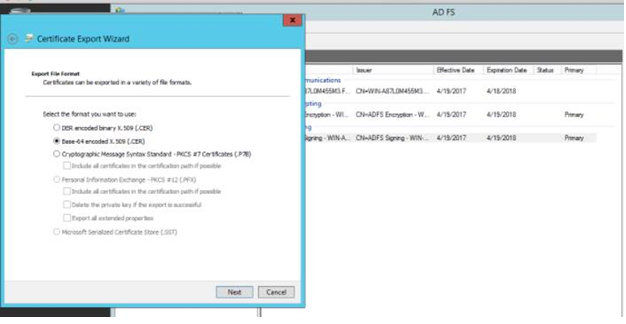
- If you can’t download Metadata to import, copy the X509 Certificate file for safe keeping.
FAQs - Refer to Knowledgebase - Knowledgebase > FAQs.
- Wasp Cloud products: SSO setup with ADFS: Required fields, XML file, and other info
- Wasp Cloud products: SSO setup with Azure AD SAML: Required fields, XML file, and other info
- Wasp Cloud products: SSO setup with Google App SAML: Required fields, XML file, and other info
- Wasp Cloud products: SSO setup with Okta SAML: Required fields, XML file, and other info
Note: Use of the resources described here requires internet access.


