New Notification
The New Notification screen allows you to set triggers and configure alerts.
New Notification screen
New Notification Screen
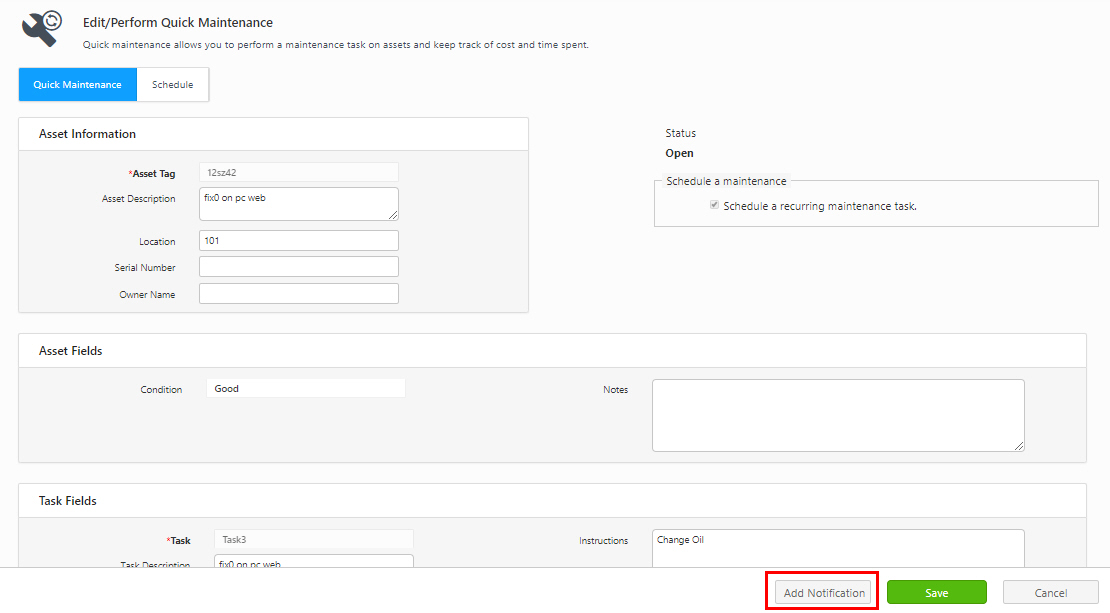
- Click on the Add Notification button on the New Quick Maintenance screen OR Edit/Perform Quick Maintenance screen.

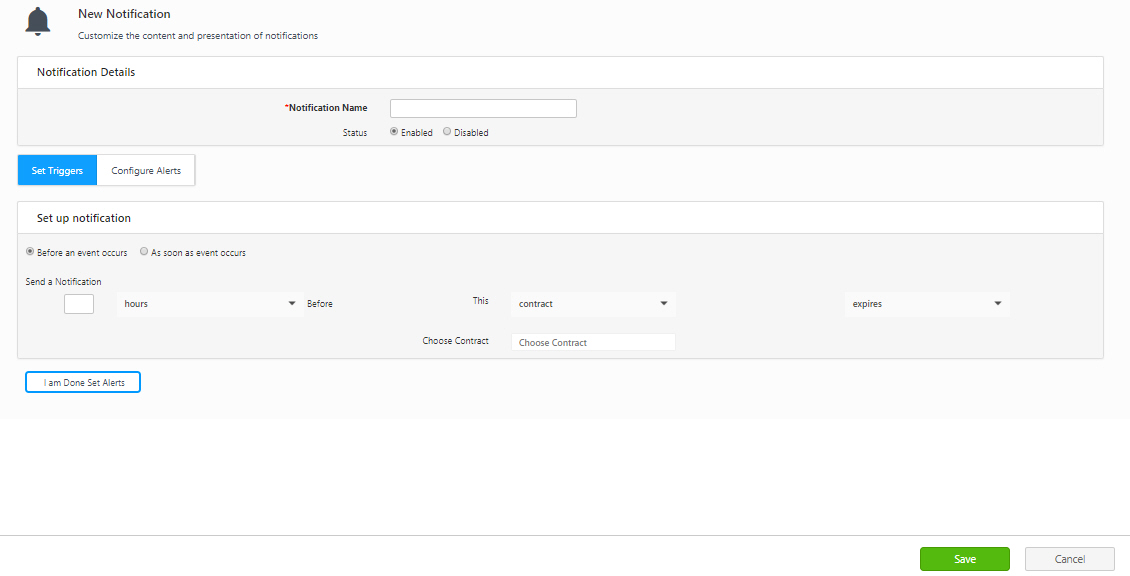
- A new notification screen will appear.

Notification Details
- Enter the Notification Name.
- Set the status of the notification. The options are Enabled and Disabled.
- To set up triggers, click on the Set Trigger tab, and to configure alerts, click on the Configure Alerts tab.
Set Triggers
Set up notification - The trigger can be set up before an event or as soon as the event occurs.
- Before an event:
- Click on the Before an event occurs radio button.

- Enter the number in the empty box. This field indicates the number of hours/days/weeks/months.
- Select hours/days/weeks/months from the drop down option.
- Select contract/ funding/ asset/ audit window/ quick maintenance task in the This field.
- The following field will change based on the options selected by you in the This field. The options are expires (contract), is due back (asset, quick maintenance task), and ends (audit window).
- Choose the name of the contract/funding/asset/audit window/quick maintenance task.
Or
- As soon as event occurs
- Click on the As soon as event occurs radio button.

- Select - any asset/ a specific asset/ a specific asset type/ any site/ any location/ any vendor/ any customer/ any employee/ any work order/ a specific work order in the When field.
- Select No Filter/ Asset Type/ Funding / Status (appears for work order).
- Select - past due/ move/ checkout to/ checkout/ check in by/ check in/ dispose/ recover/ created/ changed /opened/ In progress/ closed/ completed in the Is field.
- Enter the Asset type / Funding Name / Work order name/ Asset type name.
- Enter notes, if any.
- Click on the I am done Set Alerts button. The screen will navigate to Configure Alerts screen.
Configure Alerts
Configure Alerts screen allows you to configure alerts.
Notify in these formats
- The notification can be sent via e-mail or web browser. Click on the Email / Web Browser checkbox. You can select both checkboxes.
- Click on the Preview link for Report View.
- Click on the Template button to update the template format.

Choose Recipients
- Click the Send to myself / Assignee / Assignee's Manager checkbox. You can select all three checkboxes.

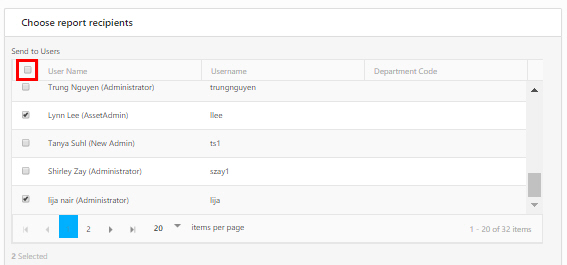
- Send to Users - Select the users for sending the scheduled maintenance updates by clicking on the checkbox(s). You can also select all the users by clicking on the checkbox next to the User Name field.

- Send to Roles - Select the roles for sending the scheduled maintenance updates by clicking on the checkbox(s). You can also select all the users by clicking on the checkbox next to the Role field.
- Send to these e-mail addresses - Enter the e-mail addresses.
- Click on the Save button.
- The screen will navigate to the Quick Maintenance - Schedule screen.


